Hoover Fh40010b Owner's Manual
Browse online or download Owner's Manual for Vacuum cleaners Hoover Fh40010b. Hoover Fh40010b Owner's Manual User Manual
- Page / 48
- Table of contents
- TROUBLESHOOTING
- BOOKMARKS
- OWNER’S MANUAL 1
- CONTENTS 2
- IMPORTANT SAFETY INSTRUCTIONS 3
- GROUNDING INSTRUCTIONS 4
- 1. CLEANER ASSEMBLY 5
- 2. HOW TO USE 6
- TRANSPORTING 7
- MODE SELECTOR DIAL 7
- THE TANKS: 8
- CLEAN WATER SOLUTION TANK 8
- IMPORTANT 10
- 4. MAINTENANCE 11
- LUBRICATION 12
- 5. TROUBLESHOOTING 13
- 6. SERVICE 14
- 7. CLEANING PRODUCTS 15
- 8. WARRANTY 16
- MANUAL DEL PROPIETARIO 17
- CÓDIGO DE FABRICACIÓN 18
- SALVAGUARDIAS IMPORTANTES! 19
- GROUNDING 20
- OUTLET BOX 20
- ENSAMBLE EL MANGO 21
- CONTENIDO DE LA CAJA 21
- 2. FUNCIONAMIENTO 22
- TRANSPORTE 23
- SELECTOR DE MODO 23
- PRECAUCIóN 24
- 2.15 2.16 25
- 2.17 2.18 25
- 2.19 2.20 25
- IMPORTANTE 26
- ADVERTENCIA 29
- 6. SERVICIO 30
- 7. PRODUCTOS DE LIMPIEZA 31
- 8. GARANTÍA 32
- GUIDE D’UTILISATION 33
- CODE DE FABRICATION 34
- AFIN DE RÉDUIRE AU 35
- CONTENU DE L’EMBALLAGE 37
- MONTAGE DU MANCHE 37
- INSTALLER LES BROSSES ET 37
- L’EMBOUT 37
- 2. UTILISATION 38
- TRANSPORT 39
- CADRAN SÉLECTEUR 39
- MISE EN GARDE 40
- AVERTISSEMENT 45
- 7. PRODUITS NETTOYANTS 47
- 8. GARANTIE 48
Summary of Contents
www.hoover.comOWNER’S MANUALOperating and Servicing Instructions©2009 Techtronic Floor Care Technology Limited. All rights reserved. #960009623 ID100
10RECOMMENDED CLEANING SEQUENCEUse your HOOVER® FloorMate™ SpinScrub® Cleaner to:• VACUUM: Vacuum to remove loose dirt, hair and debris.• WASH: Cl
11PICKING UP SPILLSYour cleaner may also be used to pick up small liquid spills (1 quart or less, never to exceed 1/4 inch in depth) on non-carpe
12BRUSHES: How to Change and CleanThe brush assembly can be removed for easy cleaning.How to RemovePlace handle in the upright position.Remove
13PROBLEM POSSIBLE CAUSE POSSIBLE SOLUTIONCleaner won’t run1. Power cord not firmly plugged into outlet.1. Plug unit in firmly. 2. Blown fuse or
14To obtain approved Hoover® service and genuine Hoover® parts, locate the nearest Authorized Hoover® Warranty Service Dealer (Depot) by: • Checking
157. CLEANING PRODUCTS7. CLEANING PRODUCTSWARNING: To reduce the risk of fire and electric shock due to internal component damage, use onl
16LIMITED ONE YEAR WARRANTY(Domestic Use)WHAT THIS WARRANTY COVERSWhen used and maintained in normal household use and in accordance with the Owner’s
©2009 Techtronic Floor Care Technology Limited. Todos los derechos reservados. #960009623 ID100507-R0IMPORTANTE: LEA ATENTAMENTE ANTES DE ENSAMBLAR Y
E2Gracias por haber elegido un producto HOOVER®.Anote los números completos de Código de fabricación en los espacios provistos.MODELOCÓDIGO DE FABRICA
E3¡SALVAGUARDIAS IMPORTANTES!¡GUARDE ESTAS INSTRUCCIONES!Al usar un aparato eléctrico, observe siempre las precauciones básicas,incluyendol
2CONTENTSThank you for choosing a HOOVER® product.Please enter the complete model and Manufacturing Code in the spaces provided.MODELMFG. CODEHi
E4• Mantengalosdetergentesyotroslimpiadoresfueradelalcancedelosniños.• Nolausepararecogerlejía,líquidosparadestupir,gasolinani
1. ENSAMBLADO DE LA ASPIRADORA A. Limpiadora para pisos de superficie duraB. Mango superiorC. Conjunto de escobillasD. BoquillaE. Concentrado de limpi
CÓMO DOBLAR EL MANGO1.9 Presione el botón para soltar el mango superior (B) para doblar el mango a la posición de almacenamiento.1.8 Levante
E7TRANSPORTE2.4 Para mover la limpiadora de una habitación a otra, coloque el mango en la posición vertical, incline la limpiadora hacia atrás so
LOS TANQUES:TANQUE PARA LA SOLUCIÓN (superior)Desconecte la limpiadora de la toma de corriente eléctrica.El tanque para la solución guarda el de
E9FILTROSLa tapa del tanque contiene un filtro lavable y reutilizable. Limpie este filtro tableado cuando la succión sea baja o se reduzca.Có
E10SECUENCIA RECOMENDADA DE LIMPIEZAUse su limpiadora HOOVER® FloorMate™ SpinScrub® para: • VACUUM: Aspirar en seco para sacar suciedad suelta, cabe
E11PARA RECOGER DERRAMESSu limpiadora también se puede usar para recoger pequeños derrames de líquidos (0,9 L [1 cuarto de galón] o menos, nunca debe
E12ESCOBILLAS: Cómo cambiarlos y limpiarlosEl conjunto de las escobillas se puede sacar para facilitar su limpieza.Cómo quitarColoque el mango en la p
E13PROBLEMA CAUSA POSIBLE SOLUCIÓN POSIBLELa aspiradora no funciona1. No está bien enchufada. 1. Enchúfela bien.2. Fusible quemado o se disparó el
3IMPORTANT SAFETY INSTRUCTIONSSAVE THESE INSTRUCTIONSWhen using an electrical appliance, basic precautions should always be followed,includ
E14Para obtener un servicio aprobado de Hoover® y piezas genuinas de Hoover®, encuentre el Concesionario autorizado de servicio de garantía de Hoover®
E157. PRODUCTOS DE LIMPIEZA7. PRODUCTOS DE LIMPIEZAADVERTENCIA: Para reducir el riesgo de incendio y descarga eléctrica debido a daños de los componen
E168. GARANTÍAGARANTÍA LIMITADA DE UN AÑO(Para uso doméstico)QUÉ CUBRE ESTA GARANTÍASiempre que el uso y el mantenimiento de su producto HOOVER® s
IMPORTANT : LIRE CES INSTRUCTIONS ATTENTIVEMENT AVANT D’UTILISER L’ASPIRATEUR. Vous avez des questions ou des inquiétudes? Pour obtenir de l’aide et a
Merci d’avoir choisi un produit HOOVERMD.Veuillez inscrire les numéros de modèle et de série COMPLETS dans les espaces fournis à cet effetMODÈ
CONSIGNES DE SÉCURITÉ IMPORTANTESRANGER ET CONSERVER CES INSTRUCTIONSDurant l’utilisation d’un appareil électrique, toujours respecter les précautions
CONSIGNES DE MISE À LA TERRECetappareildoitêtremisàlaterre.Encasdedéfectuositéoudebris,lamiseàlaterrefournitunespacedemoindre
1. ENSAMBLADO DE LA ASPIRADORAN CONTENU DE L’EMBALLAGE5 A. Aspirateur pour sol dur B. Partie supérieure du manche C. Ensemble de brosses D. Buse E
COMMENT REPLIER LE MANCHE1.9 Pour remettre le manche en position de rangement, ap-puyer sur le bouton de dégagement qui se trouve sur la p
7TRANSPORT2.4. Pour déplacer l’appareil d’une pièce à l’autre, placer le manche à la position verticale, incliner l’appareil sur ses roulettes a
GROUNDINGOUTLET BOXBAC4• Donotuseaflammableorcombustibleliquidtocleanafloor.• UseonlycommerciallyavailableHoover®cleanersintendedf
LES RÉSERVOIRS :RÉSERVOIR À SOLUTION (supérieur)Couper l’alimentation électrique de l’appareil (position OFF) et le débrancher.Le réservoir à solut
9FILTRESLe couvercle du réservoir contient un filtre lavable et réutilisable. Laver ce filtre plissé lorsque la succion est faible ou réduite.Comment
SÉQUENCE DE NETTOYAGE RECOMMANDÉEUtiliser l’aspirateur FloorMateMC SpinScrub® de HOOVERMD pour : • VACUUM : Le ramassage à sec de la saleté, des chev
4. ENTRETIENIl est recommandé de vous familiariser avec les tâches d’entretien; l’utilisation et l’entretien appropriés de l’appareil assureront son b
12BROSSES: Changement et nettoyageL’ensemble des brosses peut être enlevé pour en faciliter le nettoyage.How to RemovePlacer le manche à la position v
135. DÉPANNAGESi un problème mineur survient, il est habituellement possible de le résoudre facilement si la cause est déterminée à l’aide de la liste
Pour obtenir du service autorisé HooverMD et des pièces HooverMD d’origine, trouver l’atelier de service garanti autorisé (dépôt) le plus près de chez
7. PRODUITS NETTOYANTS7. PRODUITS NETTOYANTSAVERTISSEMENT : Pour réduire les risques de choc électrique causés par des composants internes
8. GARANTIEGARANTIE LIMITÉE DE UN AN(Usage domestique)ÉLÉMENTS COUVERTS PAR LA PRÉSENTE GARANTIEVotre produit HOOVERMD est garanti pour des conditi
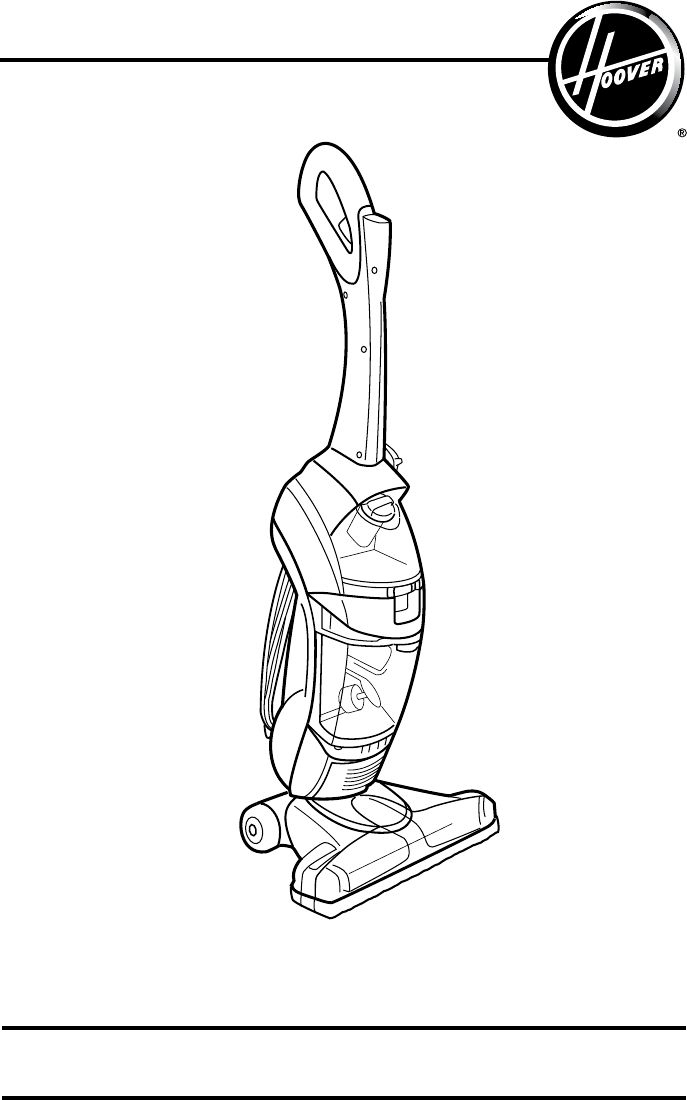
1. CLEANER ASSEMBLY A. Hard floor cleaner B. Upper handleC. Brush assemblyD. NozzleE. Hard Floor Cleaning Detergent1.2 Rotate bottom handle suppor
HOW TO FOLD HANDLE1.9 Press upper handle release button (B) to fold handle to storage position. 1.91.8 Raise upper handle (A) to upright positi
7TRANSPORTING2.42.4. To move your cleaner from room to room, put handle in upright position, tilt cleaner back on rear wheels and push forward.2.5 The
CAUTION! !DO NOT use cleaning concentrates that contain solvent based ingredients.THE TANKS:CLEAN WATER SOLUTION TANK (upper tank) Turn cleane
9FILTERSThe tank lid contains a washable, reusable filter. Clean this filter when suction is low or reduced.How to CleanTurn cleaner off and disconnec
Related products and manuals for Vacuum cleaners Hoover Fh40010b
 (15 pages)
(14 pages)
(14 pages)
(15 pages)
(14 pages)
(14 pages)
 (16 pages)
  (33 pages)
 (15 pages)
 (40 pages)
© 2020, manymanuals.com. All rights reserved. | 4.671 s |
 Manymanuals.com
 Manymanuals.de
 Manymanuals.fr
 Manymanuals.it
 Manymanuals.pl
 Manymanuals.cz
 Manymanuals.es
 Manymanuals-pt.com
Comments to this Manuals